Saturday, November 26, 2011

Welding, pumps, and solenoids ...

I bought my welding machine last week! I splashed out on an ESAB MIG unit (very reputable brand). The 3 options available were a normal stick/arc welder, a MIG unit, or a TIG unit.

For stainless welding TIG is generally considered the best, but this requires 2 hands coordinating the arc and feeding the electrode in. It is also generally considered the hardest to do well and since I am not even a welders a-hole, I figured to steer away from TIG. They can also be quite expensive machines.

The other end of the scale was a normal stick welder. You can get these units reasonably cheaply and you can get stainless Electrodes with flux on the outside, but it can be challenging to get a decent weld unless you have a heap of practice (welding is an art!). For stainless, stick welding doesn't necessarily provide great shielding gasses from the flux (compared to MIG and TIG) so there is a risk of corrosion creeping into the weld as well.

So the other option was MIG. MIG actually isn't the most recommended type of welding to use for stainless as it generally requires a specific blend of shielding gas (either very expensive tri-mix or a combination of argon and CO2 in roughly 98:2 ratio) and these gasses can be expensive. It also is said to be not the best on thin walled steel such as my kegs so that put me off a bit, but when all things were evaluated, I went with MIG. The main reasons I went with a MIG are that even a welders a-hole can generally get decent looking welds with a MIG unit, I can get reasonably cheap argon in disposable bottles from a shop nearby, you can use pure argon and get reasonable welds (even if they are higher than wider in general), the stainless qualities can be retained, and if you get a good unit, do plenty of practice, know your settings of wire speed vs voltage, weld in a special way for thin materials (focus the heat onto the coupling rather than the thin walled keg) then you should be able to do ok. It is also a good unit to use for general fabrication work down the track. From what I read, you generally get what you pay for with MIG units and the cheaper ones will give you a lot of grief with wire feeding, so I got a very reputable ESAB machine - Origo C141 to be precise!

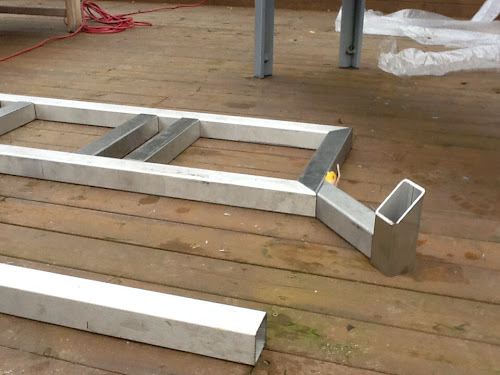
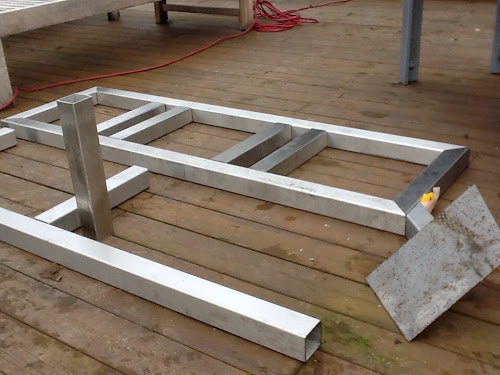
So I got the welder, got some argon shielding gas with regulator, some stainless wire spools, welding helmet, and all the other necessary stuff and lay down some welds tonight for the first time. I didn't focus on anything critical or that will be on full view, and the welds were ok I guess, but I just welded up one of the brackets that will support one of the burners. I think for my first welds they weren't too bad and I think all the research I put into welding (wire speeds, gasses, push vs pull technique, whip vs weave, weld fit up, tip stick out distances, tip clearances, etc etc) will pay off.

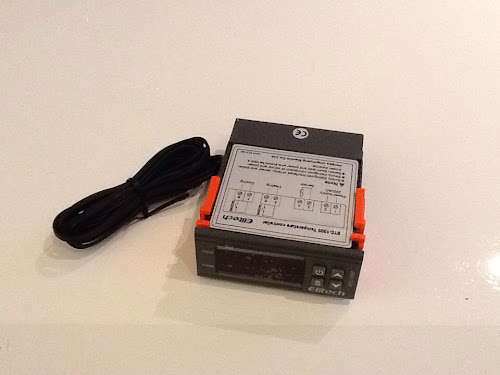
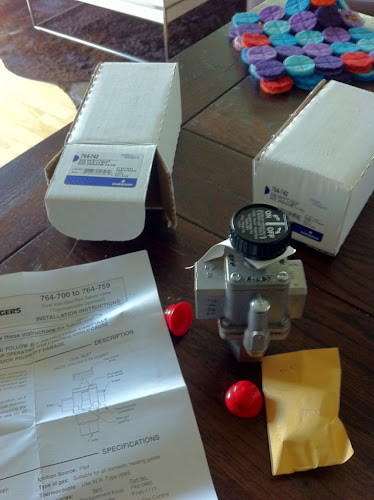
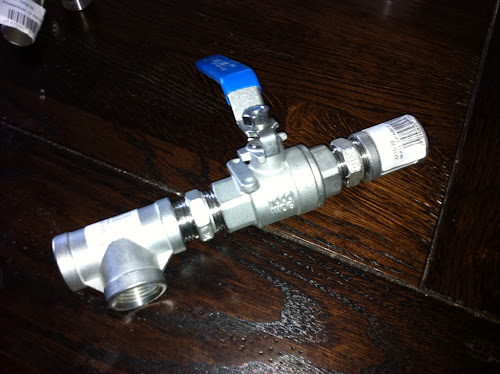
I also picked up my awesome pumps for the system today as well as my gas solenoid valves! The pumps are the brewers standard March pump! These are the 809-HS pump and are a food grade, magnetic drive pump that will be responsible for transferring and recirculating various fluids from and between the different keggles. The solenoid valves will open when told to by the temperature controllers and let gas to the burners for heating the HLT and MLT. They are a NC (normally closed) valve so that they only need to be energized when gas is needed for burning.

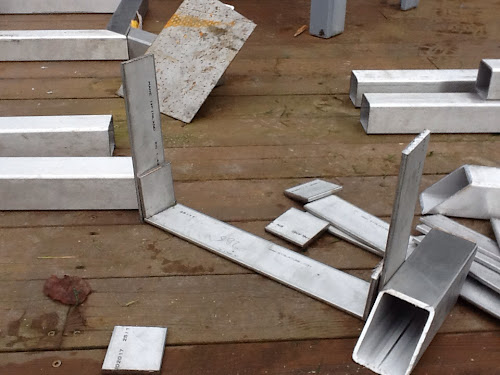
So all in all, even though no major progress has been made on the brewing system, I feel as though there is really not much stopping me now from getting this beast on the road. Once I have done some more practice welds on less critical items, I might start tack welding the frame together and get that done before trying out some welds on the keg lids to ensure I have the wire speed and voltage correct to avoid any blow-outs on my precious kegs!

My ESAB MIG unit

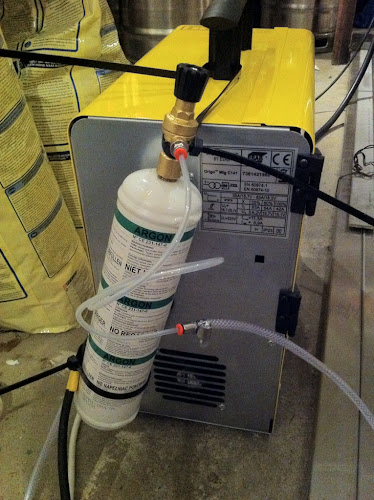
The disposable argon gas bottles. Hopefully these will last a decent amount of welds.

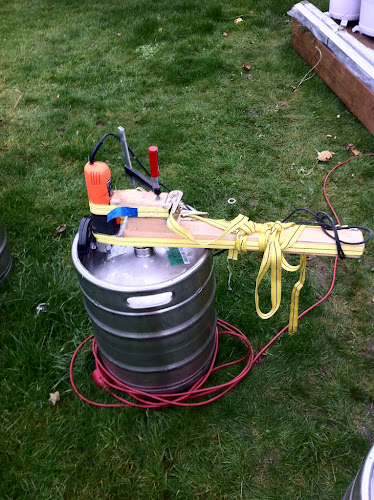
My welding station ... with keg stool of course!

Not bad for my first welds.

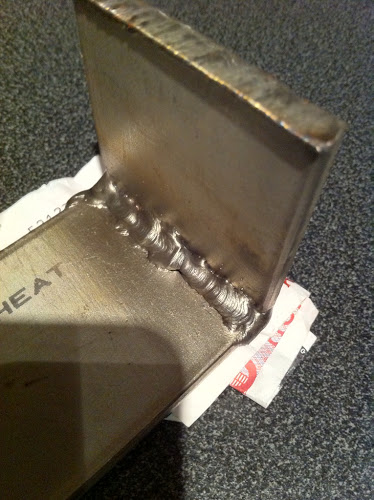
The other side of the fillet.

My beautiful magnetic drive March pumps - the brewers standard!

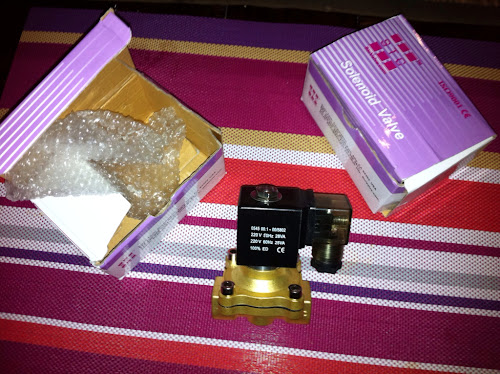
My solenoid valves - clever things!

Our little water baby

Cami and I have been going to baby swimming lessons since august. It has been lovely getting in the pool with her each week and seeing her enjoy the water and learn a lot about moving in the water. Each week we have been building up to diving, teaching her how and when to close her nose and mouth so as not to breathe in any water, and not to be fussed when she gets water in her eyes. She has really enjoyed it and here are a few photos from the classes, including an underwater photo of her diving.

Sunday, November 20, 2011

Need a brew system name ...

Any suggestions for a good brew system name? I have made quite a few small modifications to Lonnie Mac's original and still brilliant Brutus system so figured I should give mine a name of its own.

Am happy to take suggestions in the comments section because Emma isn't coming up with anything decent! ;-)

Some early suggestions:

1. The Tusen Magoosen
2. ...

Saturday, November 19, 2011

Brew system continues ...

Some progress has been made this week on my brew system. I have been doing a lot of extra research much to Emma's annoyance (welding methods and systems, welding gas types, where to get gas, welding wire selection, ways to flare a coupler into the keg, distance of burners from keggles, etc etc etc). It is really fascinating how much information is out there and how complicated you could make it if you wanted! I think the important thing I need to remember is that I am not building a space station so I need to come up with realistic yet robust systems for the brew setup. Saying that however, I have decided to improve on a number of features that other systems have out there and effectively take the best from the rest! But doing it in a reasonably straightforward way!

Anyway the main progress this weekend has been the cutting of all of the framework stainless steel. I hired a big metal saw from "the neighbour" (Naboen.no) which is a really cool rental place which has heaps of cool manly tools! I picked it up on Friday arvo and today got all of the cutting done. It was a very cool tool and managed to slice through the stainless like butter without imparting too much heat into it (which can ruin some of the stainless qualities). One of the improvements over other systems has been to mitre the top corners. This will give me a nice smooth top surface for the kegs to sit on, and it looks cool also. I also cut all of the legs, the support beams, and the second shelf frame work which includes the gas beam. I haven't started to weld it up yet but most of the hard work is done and the metal saw gave some really nice clean cuts as well (which should help a lot with good joint fit up during the welding process). I also cut some scrap sections where I can practice my welding on before hitting the frame itself.

One other improvement over some systems will be the ability to change my burner height. From what I have been reading there are many different opinions regarding how far away the burner tips should be away from the bottom of the kegs. So I have included a shelf system for the burners which will allow them to be adjusted reasonably easily (I.e. no welding required to change height).

The other good stuff that arrived this week was the two Honeywell pilot lights (I only need these on the automated burners under the HLT and MLT (the boil kettle is best to be manually controlled to maintain a rolling boil). I will install these into the adjustable shelf for the burners when I get the burners. I also received my neat little temperature controller (STC 1000). This allows me to set the target temperature of the HLT or MLT and then the STC 1000 sensor will measure the actual temp and if this is lower than target it will then open the solenoid valve to the burner and presto - the heat will go up.

The hired metal saw from Naboen

Some of the legs and horizontal supports

How the top of the brew system will look with the nice mitred corners

The front section and how it roughly goes together (if you have a good 3D imagination)

Some rough preliminary thoughts on how to mount the control panel

Will need some plate I can attach the electrical enclosure onto (food for thought)

These will form the basis for the adjustable height burners

Quick 3D autocad sketchup for confirming all the lengths for the cuts today

The pilot burners

The fancy digital temperature controller and sensor (I need 2 of these to control both HLT and MLT temps)

Wednesday, November 16, 2011

Brutus Nervous System Arrives!

Received a care package today courtesy of USPS! Thankfully under the 400kr limit (inclusive of postage) so the Toll Nazi's didn't gouge me for it. What I received today is a core part of the safety system I am including in my brew setup and will work together with the gas pilot safety valves I got the other day. It is some thermocouples which will be used to sense the pilot light and if it blows out then they will tell the gas pilot safety valve to switch off and not send gas to the burner.


Anyway - here they are. I accidentally ordered one more than I needed - always nice to have a spare I guess?!?!


I also found out that the welder I have decided on is in stock so I pick that up on Friday. I also pick up the hired metal saw so I can prep the stainless ready for welding the frame. Good stuff hey!

Now ... off to get myself a beer ... specifically a little creatures pale ale clone!

Sunday, November 13, 2011

The Brutus Stomach is Born!

Norwegian Fathers day today! Thank you to my darling daughter for bringing me a coffee in bed along with some freshly cooked ANZAC cookies! Yum. I was also surprised with a beautiful set of paintings that Cami had done for me.
Thanks to my amazing wifey for helping Cami with all of this. I am a very lucky daddy!

Cami's artwork for her Daddy!

Cami also spoiled me by having a long sleep in the afternoon which allowed me to work on Brutus. Today I made a jig for my grinder that allowed me to make near perfect circular holes in the top of my kegs for the keggles. So today I cut the 3 lids off the kegs and then got a flap disc onto the edges for a nice and safe and neat finish. I plan to weld a handle into the 3 lids and will probably flatten and bend the pick-up tubes from the original kegs and make a nice stainless handle for the lids. I will also need to weld off the opening from the old keg valves. So this is the stomach of Brutus where the wort will be created from pure Norwegian water and crushed malted barley.

The jig for the grinder to make a perfect circle - grinders are as scary as chainsaws!

Close up of the jig - I was still a little nervous using this but it all worked out OK.

First lid cut off - the cutting disc caught in a few spots and gave a few rough edges, but all in all pretty good.

With what will be the lid of the keggle.

The pick-up tubes I will modify and use as a handle for the lids.

The second keg I did was the most perfect - must have got impatient by the third!

All 3 keg lids cut off - just need some buffing up with the flap-disc.


And this is the stainless square section that will form the skeleton of Brutus - next weekends task!


Happy Father's Day to all the lucky Dad's in Norway today!

Saturday, November 12, 2011

Crooze-ing along!

Thanks to Dad and Sharyn Ireland, we have a lovely new Croozer-kid-2! We put this together last weekend and gave it a crack today. It comes in 3 different modes - currently set up in the inspiring but likely under-utilized "jogging-mode". When we get Cami a helmet we will change it to bike trailer mode, attach it to our bikes and can head off on outings and things but will likely use it daily for the barnehage (kindergarten) drop offs and pick ups! In the meantime, hopefully my back keeps on the mend and I can get out with the jogging a little more.

Here is a pic of Em and Cami on their first outing.

Thanks Dad and Sharyn for this lovely gift!

The Brutus Brain and Skeleton is being pieced together!

I received some goodies in the post yesterday. For those of you interested I received a White-Rodgers 764-742 Gas Pilot Safety Valve (thermocouple operated). This will form part of the brain of the brew system and will provide a good safety system. As the burner system will be automated and will automatically fire the burners when there is a drop in either hot liquor tank (HLT) temperature or also for a drop in the Mash & Lautering Tun (MLT) temperature then I need to make sure that when doing this outside (also for safety reasons with the LP gas) that if the pilot light blows out it will shut off the gas supply to the burners. Therefore I have also ordered some good pilot burners (Honeywell Q314A) and a thermocouple to go with the gas pilot safety valves. These will arrive in the next week or so.

Here is a picture of the gas pilot safety valve.

I have also today gone and picked up some other important parts. The first one is a bunch of fittings for the brewing liquid system. I plan on welding (using a new MIG system) the 1/2" pipe couplers onto the side of the keggles (the BK, MLT and HLT) which will allow me to add various fittings and parts to my keg. The main fitting will be the drain which will include the ball valves. On the MLT I will also include a Tee piece which will allow me to fit a thermowell inline into the system so that I can plug in my thermosensor in-line and have accurate measurement of the wort as it is being recirculated through the RIMS system. This thermosensor will feedback info to the temperature controller and fire the burner under the MLT if the temperature drops below the necessary mashing or sparging temperatures. Easy-peasy!

Anyway here are my stainless fittings (316 stainless no-less!!) which I picked up from Maritim.no down here in Stavanger. Got a very good price on them too!

Here is how the Tee system will be setup with the pipe couple on the end welded onto the keg for the MLT. On the other end at the tee will be a 1/2" thermowell which will measure the mashing temps "in-line". I will then drain or re-circulate from the bottom of the Tee back into the MLT or when I am sparging straight into the BK.

The other thing I picked up today was the skeleton of the system! This is some lovely polished 304 stainless steel which will be cut next weekend (using a hired steel cutting saw). I plan on mitering the top corners for the frame so that it is a nice and flush surface for the kegs to sit on. The rest will be plain square ends. I haven't decided whether to include a gas beam into the system yet or whether I will just have it plumbed externally and secure the plumbing to the frame. I'm leaning towards a gas beam but haven't yet concluded on the final set up for the gas system. So the steel you see on my car roof is 18m of 304 stainless box section (50 x 50 x 3mm) as well as some flat bar which will be used to create an adjustable burner shelf so i can adjust the flame height/position once I see where it fits best. All exciting stuff I can tell you!

My lovely 304 stainless!

I have also decided on what MIG system I will get. It ain't cheap but it's a he'll of a lot cheaper than any other decent MIG system and will provide sufficient power to weld the 3mm wall of the frame. I'll include an argon gas shielding system and for the couplers on the kegs I will have a system to purge the back of the weld with argon to ensure no rusting as a result of the welding process. I'll show my lovely welder when I get it. If they have it in stock next week I may end up being able to perform all my cuts of the steel and start with some trial welding! My lovely steel supplier also threw in a stainless wire brush for polishing the welds after MIG-ing. Champ!

Beer on!

Friday, November 11, 2011

Perhaps the acorn didn't fall quite as far from the tree as previously thought...

Well Joel is blogging about his latest obsession hobby, so thought I could bore you from a different angle! I come from a family of knitters (on my mum's side) and while mum taught me the basics as a kid I never really took to it. I have made a cushion cover which took about 4 years, and recently finished a scarf started in 2009, so you get the idea...! But now with a cute little person to knit for, and with new inspiration from some of the gorgeous knitted clothes Cami has been given, and with a bit of added peer pressure thanks to Regina (check out her Miss Hermelin blog, link on the side), I have picked up the needles in earnest.

Honestly I think I have been put off a bit by a lot of the knitting patterns I have seen in the past featuring designs and models from 1987. But to my surprise and delight I am finding a whole new bunch of patterns which are really modern and the kids stuff is so cute! I used a Norwegian blog/website www.pickles.no and my first ever attempt at a garment, this vest.

I think it turned out really well! I'm waiting on a wool delivery for my next project, also from pickes the Darling Dress. This will include working with two colors, circular AND double pointed needles and apparently there's crocheting involved, so wish me luck, I'm going to need it!

Important Song

Thursday, November 10, 2011

It's Happening!

More planning for the ultimate brewery!

More parts are arriving tomorrow! YAY!

Friday, November 04, 2011

Mum-mum

Cami is just impressing us more and more everyday. Here are a collection of videos of her doing different stuff for your enjoyment!

Thursday, November 03, 2011

Brutus is Born!

Ok, for those non-drinkers out there (a) you will have to be patient over the next couple of months and (b) I don't really like you anyway. I have officially started a project which will consume a lot of my time, thoughts, dreams, energy and money and I hope will give me great satisfaction over the coming years.

The project is to build a sem-automated, all-grain, stainless steel, gas-fired, safety-controlled, RIMS (look it up - highly interesting for beer geeks) brewing system. I have been spending an inordinate amount of time (much to Emma's annoyance) researching how I should go about this. There are quite a lot of different set ups that many fellow beer geeks have made over the years (why are a lot of home brewers engineers?) but one in particular which has been copied, modified and built on over the years is Lonnie Macs Brutus 10 system. I have been researching this system quite a lot, I bought his plans you can buy from Brew Your Own magazine and from reading forums (mostly Aussie Home Brewer and Home Brew Forum).

I have decided to create a system using the best of a number of systems. My main criteria for this system are to have it as stainless steel system where possible, capable of doing 2 batches at once (38L), an automatic temperature controlled system for the HLT and the MLT through use of digital temperature controllers and thermistors through thermowells, pilot lights for the automated gas burners with auto shutoff valves if pilots go out, plate chiller, robust magnetic drive food grade pumps for recirculation for the RIMS as well as for transferring between HLT to MLT to Boiling kettle as well as for the plate chiller for the cold break (more beer geek talk), and a sexy control box/panel/system!

So anyway, the project has started in earnest. I have been in contact with the brewmaster from the Stavanger brewery (Lervig Aktiebryggeri) who gave me some kind pointers as well as offering some kegs for free (unfortunately they were only 30L kegs in Stainless and 50L in aliminium), as well as the main boutique beer pub in town (Cardinal), but I finally got in touch with Ola Vaaland from Bryne ølutsalg (any beer lovers in Stavanger should go there - very impressive - even managed to find a slab of VB there!!!) and Ola found 3 stainless steel 50L kegs for me and put them aside for me. I am planning on converting these into the keggles (keg turned into kettles) which will form the basis for my starting HLT, MLT and boil kettle. I will likely invest in a 70L boil kettle down the track but at least this is a start point. Oh yeah, one of the kegs is about 1/3 full of Tou beer ... It's going straight down the drain!

Kegs picked up tonight waiting conversion to keggles

VB slab ... in Bryne?!?!

I have also been ordering lots of parts for my gas setup. 2x gas pilot safety valves, 2x thermocouples for the valves, 2x solenoid gas valves for automatic control of the gas to the burners, and a few fittings and things.

I plan on getting my stainless steel square hollow section from a fabricator I know through work. Other stuff I will get locally and may even manage to sneak some pumps and Mongolian jet burners in my luggage when coming back from Oz in January!

Anyway, I want to try and document my build as much as possible so will blog regularly about it. Any comments are obviously welcome and I am sure that Cami will have some special apprentice cameo's during the build as well. For now however, it is just getting a few of the bits and pieces together and when it comes to the build I will post a lot more. I will probably start most of the build after I get back from oz in Jan.

Pic of Cami to show I haven't gone completely brewing mad!

Wish me luck!!